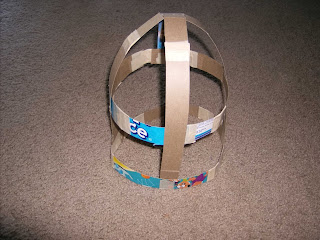
Upon doing research, I discovered a tutorial by someone who had built their own (Link: http://www.instructables.com/id/Power-Rangers-Helmet/). Spending some time on it last night I decided I couldn't get it just like that tutorial, so I've decided to take it in a fairly different direction. So far, I have made the most basic skeleton of the helmet. The most time consuming aspect of it has been continually resizing it to fit my egg head. In order to allow for constant fitting, I've decided to leave the bottom loose for now until I can figure out how to reshape it later.
The positive side of this is that I'm working with cardboard (from a cereal box) and masking tape prior to using a hot glue gun to stick the pieces together for good. Here is the first photo of my mistake:
I thought it would be a good idea try and get it below my jaw, but of course that didn't allow me to try it on very easily (beginners mistake). If it's hard to put on now, it'll be hard to put on once it's got whatever compounds I decide to use to make it a hard helmet. I cut that vertical jaw loop and thought it would be easier to make an open loop similar to the forehead loop.
This allowed for the bottom horizontal loop to go around my chin so I could try it on as I finished the skeleton. My plan is to make adjustments later to make it shaped more like the show-used helmet.
Below are pictures after I added the new loop for ease of access. The second picture is a rear view. This is going to take a lot of tweaking as the process moves forward, and certainly a lot of time because I'm a novice at this. My hope is that by sharing my mistakes, it might help save you time when you decide to craft your own.


No comments:
Post a Comment